The Redactor was created to save me a bit of time, but as you should know by now, I rarely keep these tools to myself.
So, What Does The Redactor Do?
Well, in summary, it helps you remove unwanted keywords, en masse, from a list of keywords you may have obtained from sources such as MerchantWords or SECockpit.
I use this tool for two main purposes:
- To remove keywords that contain other companies’ brand names, as Amazon does not approve of you using such names in your own listing.
- To remove keywords that contain words that are completely unrelated to my own product or that I do not wish to target, for whatever reason.
Here’s How To Use This Tool
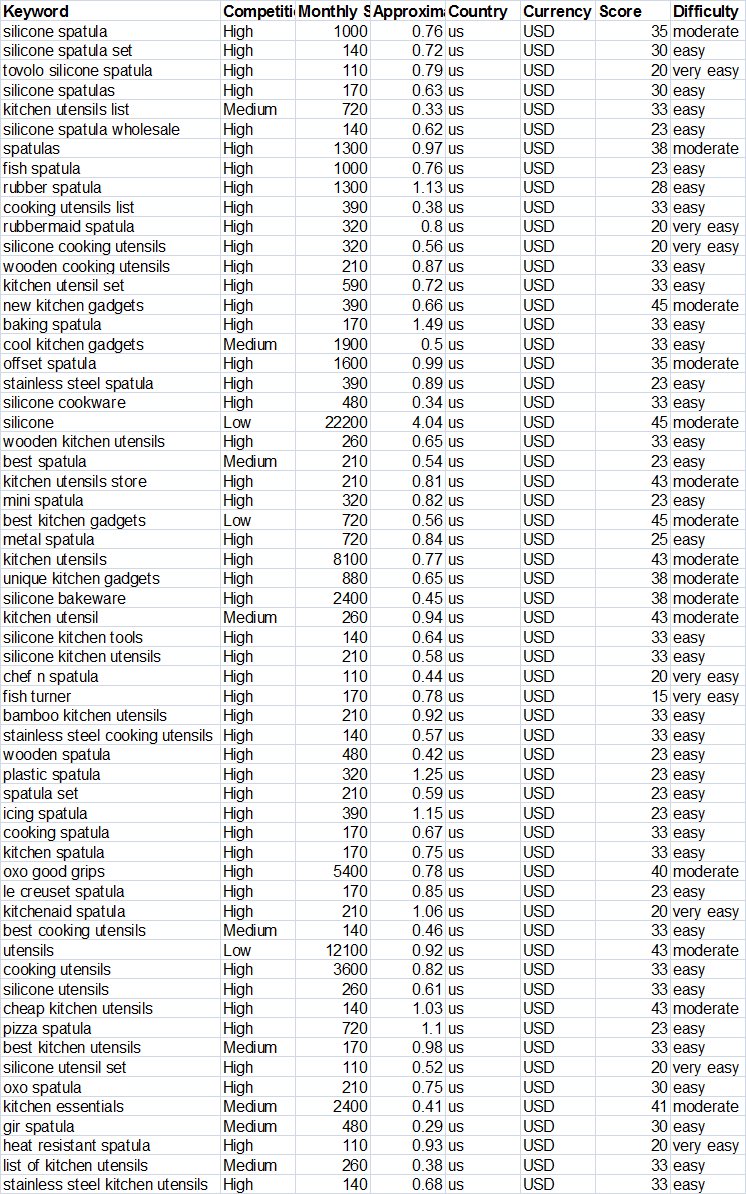
First, you need to copy some keyword data from a spreadsheet, so here are some test keywords for “silicone spatula”:
 |
Once they’re in your clipboard, you need to paste them into the Keyword Data box:
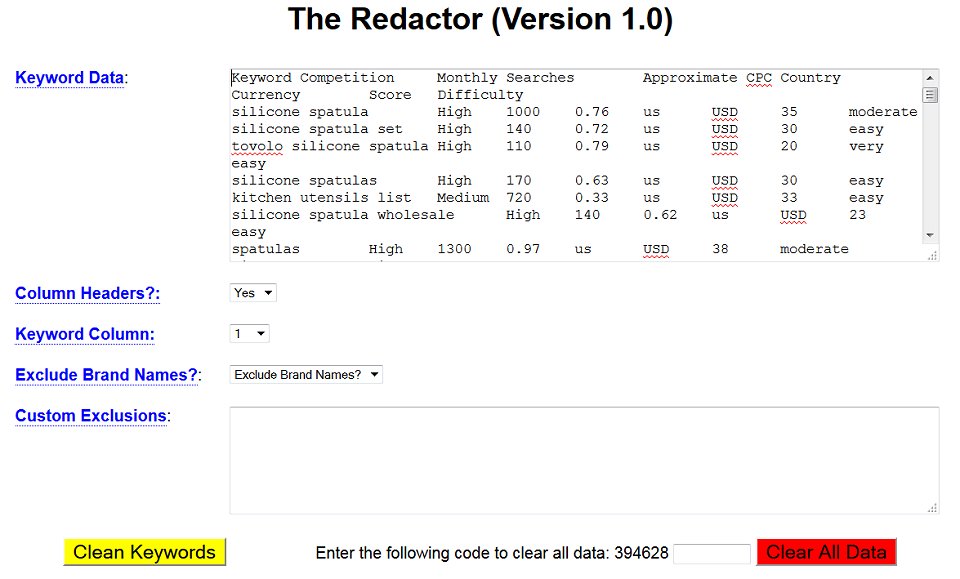 |
Next, you need to indicate whether the keyword data you just pasted in has Column Headers in the first row. The default value is Yes, but you can change that to No if you need to.
Then, you should select which column contains the keyword (or keyword phrase). The default is the first column, as this is most usual, but you can choose any value from 1 up to 50.
Now, as one of the primary features of The Redactor is to exclude brand names from your target keyword list, the next option lets you choose whether you want to exclude all the brands on the master list of over 3,000 names.
If you select Yes, a new box will appear, which will look something like this:
 |
Note that you can edit this list, either by adding or removing brands, but this will not update the database, so if you do make changes, it would be wise to copy the contents of the Brand Name box to your computer, just in case.
The last option you have is to enter one or more Custom Exclusions. This would be additional brand names you need to exclude that are not on the master list, or other terms / words that are not relevant to your product.
In the sample data above, you might want, for example, to remove keywords that contain the words “wooden” or “steel”, as these do not apply to silicone spatulas.
Note that you need to enter a single keyword or keyword phrase per line. Do not separate multiple keywords with commas.
Once you’ve entered as many exclusion terms as you need, you can click the yellow Clean Keywords button.
After a short delay, the screen will be re-displayed with the results:

You’ll be presented with a few statistics (i.e. how many keywords you entered, how many were redacted, or removed, and how many remain), as you can see from the screenshot to the right.
Clicking the Keywords Redacted link (assuming that at least one keyword was removed), will scroll you down the page to a text box that shows all of the keywords that were redacted the last time you clicked the Clean Keywords button:
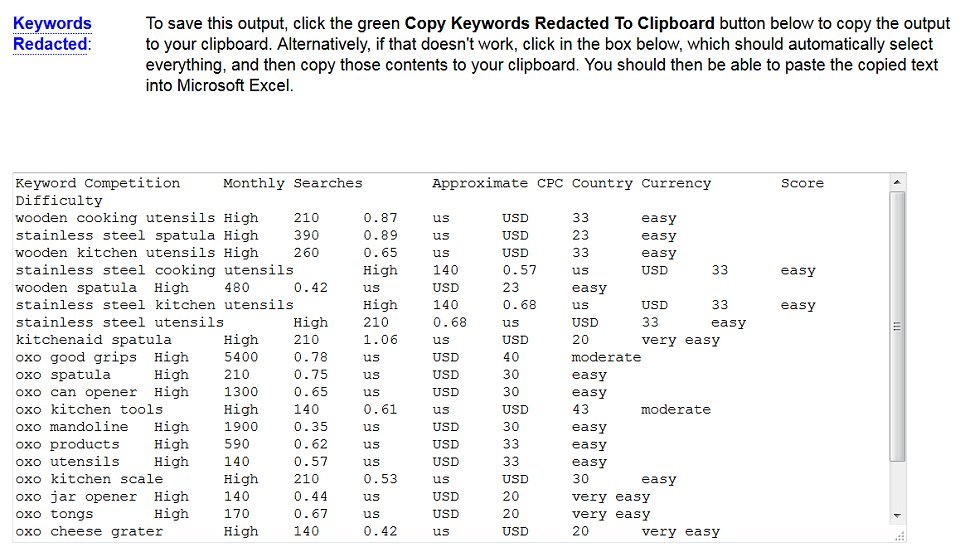 |
As you would expect, based on the data I’m using in this example, keywords containing well-known brand names (e.g. Kitchenaid, Oxo) as well as keywords containing my custom exclusions (i.e. wooden, steel) are in this list of removed keywords.
You can copy this list by clicking the green Copy Keywords Redacted To Clipboard button, if it’s present, or by clicking once in the box and then doing a CTRL-C to copy the contents.
This is useful if you want to double-check that you’ve not removed any terms you didn’t mean to exclude.
You’ll find a similar set-up if you go to the Keywords Remaining section, except, of course, this box contains the list of keywords that were not removed:
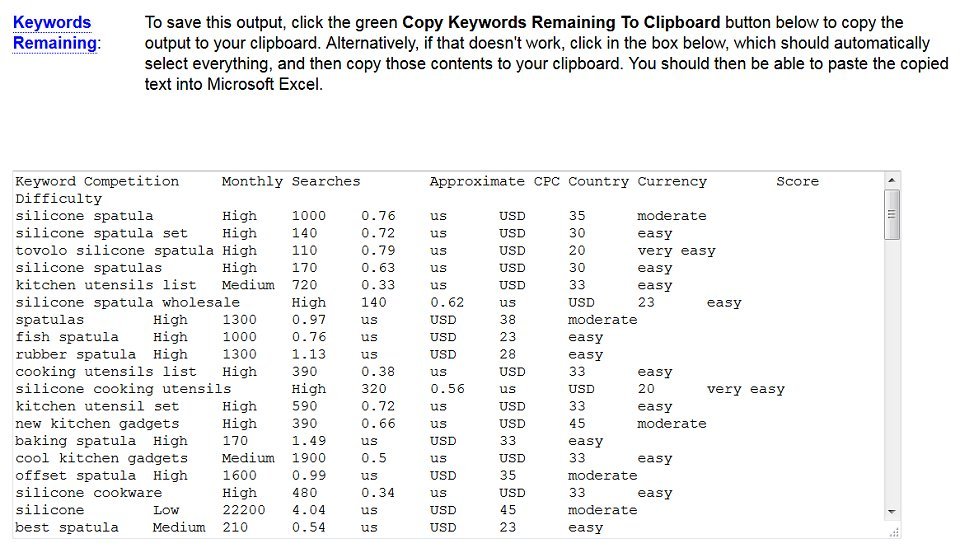 |
As before, you can copy these keywords to the clipboard so that you can paste them back into your spreadsheet.
Now, because filtering your keyword list is usually an iterative process, there is an option for you to copy the contents of the Keywords Remaining box and replace the original Keyword Data that you entered:
 |
To use this option, you need to enter the word REPLACE (and yes, it must be entirely in upper case) in the box and then click the Replace Keywords button.
Assuming this operation was successful, you’ll see a message pop up on the screen:
 |
Clicking the OK button will dismiss the pop-up.
And if there was some sort of problem (e.g. you didn’t enter the word REPLACE), you’ll see a similar pop-up with an error message.
Note: this action cannot be undone, so please make sure you’ve copied / saved any data you might need first.
You can obviously repeat the above steps as many times as you need until you’ve finished filtering your keyword list.
If you need to start afresh, then you can clear out All of the data (i.e. the Keyword Data, Custom Exclusions, Keywords Remaining, and Keywords Redacted), by entering the numeric code displayed in the box provided and clicking the red Clear All Data button:
Note: this action cannot be undone either, so please make sure you’ve copied / saved any data you might need first.
Helpful Tip
Since the process of filtering your keywords can take a while, you should make sure you’re still logged in by opening the Menu in a new tab. (If you don’t, and you get logged out, you may lose your input.)
Here’s How I Use The Redactor
I use this on copywriting projects, for example, and these are the steps I typically take:
- On the first pass, I only remove keywords that contain brands on the Master Brand list (i.e. I leave the Custom Exclusions blank).
- After the screen is re-displayed for the first time, I copy the contents of the Keywords Remaining box back into Excel.
- I also use the Replace function to overwrite the original list of keywords.
- I change the Exclude Brand Names option to No because there’s no point using this list a second time.
- I go to the spreadsheet and go down, row by row, looking for words or terms that I do not want in the final keyword list. This may be brand names that were not on the master list (e.g. tovolo), or words that are not appropriate to the product being sold (e.g. molds).
- As soon as I find a word or term I wish to exclude, I enter it in the Custom Exclusions box. (Remember, you should only enter one keyword or keyword phrase per line.)
- Once I have a good number of exclusions (and no, I don’t have a hard and fast number here), I click the Clean Keywords button.
- I then copy the Keywords Remaining back to Excel, in a new worksheet / tab, and replace the Keyword Data with those remaining keywords, just like I did before. I leave the Exclude Brand Names set at No, and I also leave the contents of the Custom Exclusions box as they were.
- I copy the contents of the Custom Exclusions box into a text file that I save on my computer, so I have a record of the terms I exclude – just in case I need to go through this process again, or the browser / computer crashes.
- I continue working my way down the spreadsheet data, from where I left off previously, entering terms I don’t want in the Custom Exclusions box.
- I repeat these steps until I’ve finished processing all of the keyword data.
- At this stage, I make sure I copy the Keywords Remaining back to my master keyword spreadsheet, but again, in a new worksheet / tab, as I never want to overwrite my master keyword list which may have taken me quite a while to create (because I use multiple keyword sources). I also make sure the full list of Custom Exclusions is saved too.
Even with The Redactor, this is still a somewhat slow and boring process – it’s just not as slow or as boring as it was before I created this tool, and you should know by now that I love to save time and effort whenever I can.
However, the question is – would you rather contribute to HP’s mega toner fund raising campaign or use the electronic Redactor which will save you a bundle in toner and paper (have you seen the cost of printer paper these days, it is super expensive)!
 |
 |
| Old way, burn thru all your cash on toner and paper… | …or use The Redactor and save big by removing stuff electronically! |
And Finally
There is an abbreviated version of the basic instructions on how to use The Redactor on the tool page itself.
As always, if you have any questions, then please do get in touch, or you could leave a comment.


